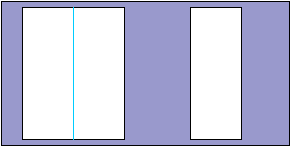
Fold an 8 1/2 x 11 sheet of paper down the middle of the 11" side. Don't panic. Just look at the pictures. On the left I'll show you what you're starting with, and I'll mark (in blue) where you're going to fold. On the right you'll see what you should end up with after each step.
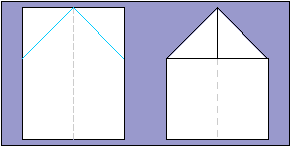
Next fold the two upper corners in at a 45-degree angle. Be careful here to line these up, and do not let the flaps cross the middle of the paper. Use the middle fold as a guide.
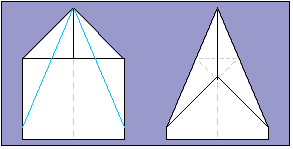
Fold each side, again using the middle as a guide. The two sides must be very even.
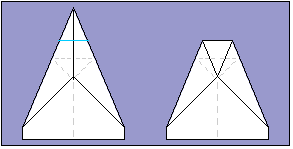
Fold the tip over, lining the pointy tip up with where the other folds meet in the middle. This provides both the proper center of gravity, and it makes the nose blunt so you won't poke your eye out.
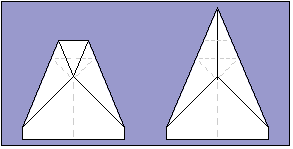
Unfold the tip. We'll be folding it back later, but we needed to crease the paper in the right place.
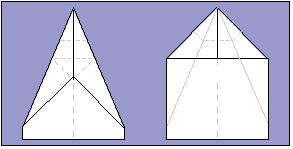
Unfold the sides. The plane should look a lot like it did at the end of step 2, but with some folds we need to use as guides.
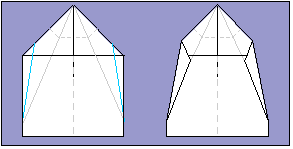
Fold the outer part of each wing in, Line up with the folds from step 3.
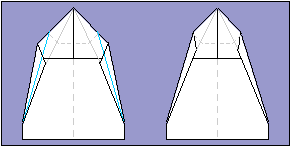
Fold the outer part of the wing again. What we are doing is making a really strong leading edge and spar for the wing.
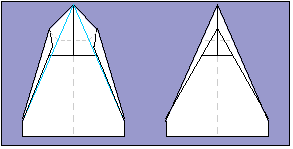
Fold the wings one more time so we are back to the correct leading edge angle. Note that the leading edges of both wings are now 5 layers thick. This gives us a nice rounded leaning edge and it makes the plane handle crashes better.
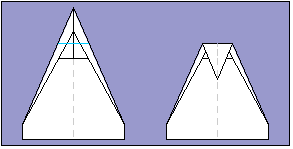
Fold the tip back using the fold lines we made in step 4. (Notice that the tip doesn't line up with any part of the plane anymore, since we rolled that material up into the leading edges of the wings. That's why I made you mark it with a fold.)
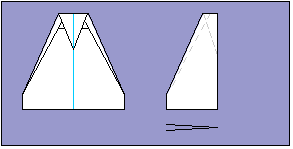
Fold down the middle and crease.
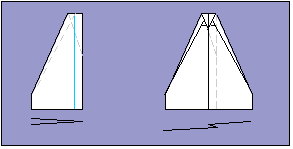
Do the first fold for the body. The body should be about half the width of the blunt end. (See the drawing)
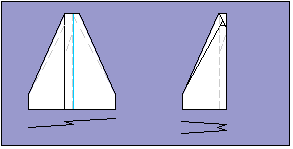
Flip the plane over and fold the other half of the body.
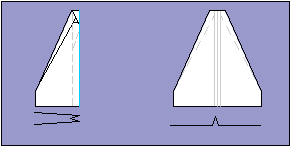
Unfold the wings so they lie flat.
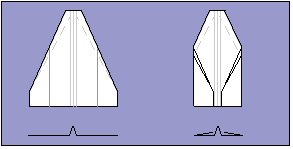
Now we'll fold the winglets. These winglets are half the width of each wing, so you can just fold them over so they meet the body.
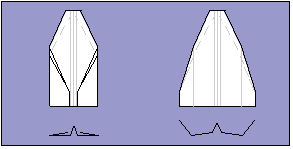
Almost done. Unfold the wings and winglets and work them until you get the shape you see on the right. There should be a very pronounced Gull Wing shape in the wings.
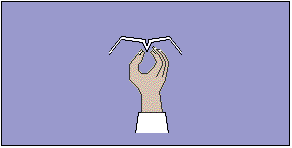
Flip it over and hold the body a couple inches behind the nose. Now give it a gentle toss. Have fun. (That's an order.)
Go ahead, don't be shy, please sign my Paper Airplane Guestbook [an error occurred while processing this directive]
November 22, 1998:
This page and all images on it are copyright © 1998 - 2000, Joseph Palmer. All Right Reserved.
Permission to link this page from your page is hereby granted under the following conditions:
a) This information is presented under non-profit conditions. Sub framing this page from
a page that contains commercial advertising for any service or product is strictly forbidden.
If you have advertisements on your page, you may provide either a direct link (No frames),
or open this page in a new browser window.
b) Sub framing from non-commercial bearing sites is allowed, but strongly discouraged. (Yech.)
c) Ordinary linking is encouraged, and yes, these are really fun airplanes. Please give them a try!