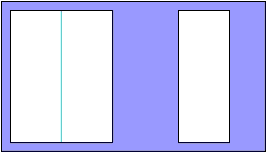
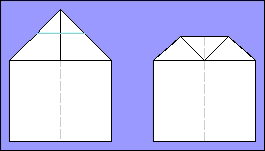
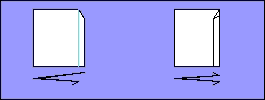
Fold an 8 1/2 x 11 inch sheet of paper down the middle of the long dimension. Don't panic. Just look at the pictures. On the left I'll show you what you're starting with, and I'll mark (in blue) where you're going to fold. On the right you'll see what you should end up with after each step.
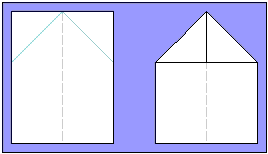
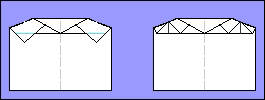
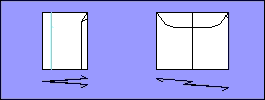
Next fold the two upper corners in at a 45-degree angle. Be careful here to line these up, and do not let the flaps cross the middle of the paper. Use the middle fold as a guide.
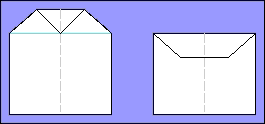
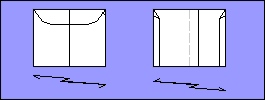
Fold the upper point over and crease.
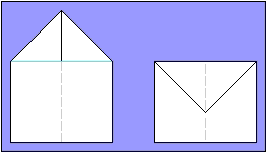
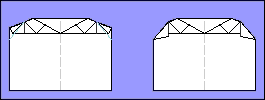
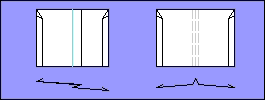
Undo Step 3. (We just need to mark the line at this time.)
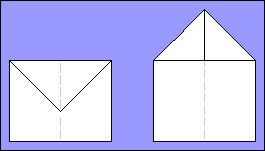
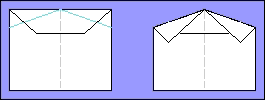
Fold over the tip as shown.
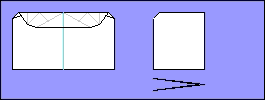
Fold again.
Fold the corners over as shown.
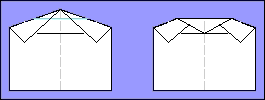
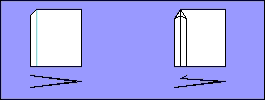
Fold the tip over.
Fold the tips up.
Fold the corners over.

Fold the nose over.
Fold the plane in half.
Fold the first winglet.
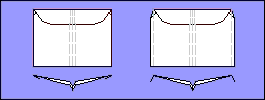
The angled lines below the picture show what the plane would look like from the back.
Fold the second winglet as shown.
Fold the wing over to make the first part of the body.
Flip the plane over.
Fold the to make the body.
Fold out the winglets, and shape the wings as shown.
Like my other designs, this plane requires no cutting, and no weights, and is made from a single whole sheet of ordinary copier paper. The blunt end provides some margin of safety, (It's up to you to provide the rest) as well as providing the proper weight balance.
This design was inspired by the square shape of Ken Blackburn's
world record paper plane, but plane folds more of the weight
to the center line, and is self-measuring: all of the wing
folds are referenced to previous
folds.
Like my other designs, it also features down-folded winglets,
but in this design they provide only a small amount of the overall lift.
This plane seems to prefer the great outdoors. I have my best flights when I throw it nearly striaght up into a mild wind. - Have fun.
Go ahead, don't be shy, please sign my Paper Airplane Guestbook [an error occurred while processing this directive]
January 16, 2000:
This page and all images on it are copyright © 1998 - 2000, Joseph Palmer. All Right Reserved.
Permission to link this page from your page is hereby granted under the following conditions:
a) This information is presented under non-profit conditions. Sub framing this page from
a page that contains commercial advertising for any service or product is strictly forbidden.
If you have advertisements on your page, you may provide either a direct link (No frames),
or open this page in a new browser window.
b) Sub framing from non-commercial bearing sites is allowed, but strongly discouraged. (Yech.)
c) Ordinary linking is encouraged, and yes, these are really fun airplanes. Please give them a try!