This plane is called the "Hybrid" for two reasons: It's a mix of PL2 and PL3, and I couldn't think up a better name! Like PL3, this plane seems to prefer the great outdoors. I have my best flights when I throw it upwards - at about a 60 degree angle. The ones I've made seem to like to do a single barrel roll on the way up, then settle into a nice smooth spiral down. By the way, I lost two of these to the garage roof, so make sure you have plenty of room to fly.
Note the addition of the little flaps on the winglets. They are optional, but I like the way this plane flies better with them. As an experiment, try making PL-4s with and without the tabs, then compare the flights.
---Joseph Palmer
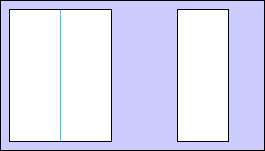
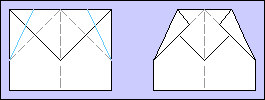
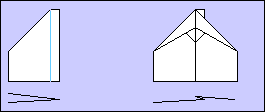
Fold an 8 1/2 x 11 inch sheet of paper down the middle of the long dimension. Don't panic. Just look at the pictures. On the left I'll show you what you're starting with, and I'll mark (in blue) where you're going to fold. On the right you'll see what you should end up with after each step.
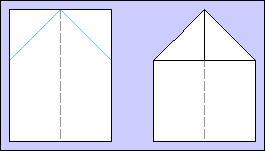
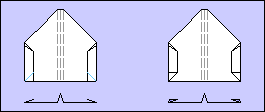
Next fold the two upper corners in at a 45-degree angle. Be careful here to line these up, and do not let the flaps cross the middle of the paper. Use the middle fold as a guide.

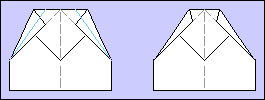
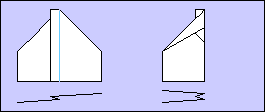
Fold the upper point over and crease.
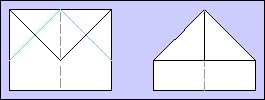
Next fold the new upper corners in at a 45-degree angle. Be careful here to line these up, and do not let the flaps cross the middle of the paper. Use the middle fold as a guide.
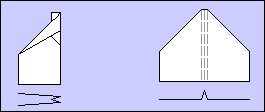
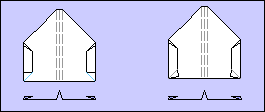
Undo step 4. (We need the creases for the next step)
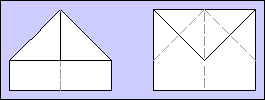
Using those creases as a guide, fold the corners as shown. What we are doing is building up an airfoil at the leading edge of the wing.
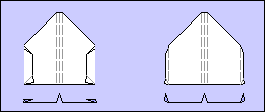
Using the edge of paper as a guide, fold the corners again, as shown.
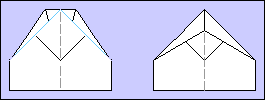
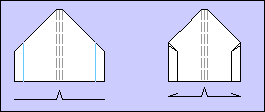
Make the final fold for the wing leading edges.
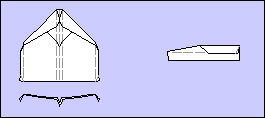
Fold the tip over. Look closely at the drawing, don't fold too much, we just want to take the sharp edge off the nose.

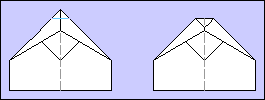
Fold the plane in half.
The angled lines below the picture show what the plane would look like from the back.
Fold the wing over to form the fuselage. Make the body nice and even. (You can see that it's even if the trailing edge of the wings makes a nice straight line)
Flip the plane over, and fold the other wing.
Lay the plane out flat.
Fold the winglets as shown. Make them about 3/4 of an inch (About 20 mm).
(Optional) Fold the trailing edge of the winglets over to form small tabs. These tabs slow the plane down a little, but they also make it more stable, and you will get longer flights.
(Optional - Part 2) Unfold the tabs and adjust to about a 30 degree angle. (You should make adjustments to these tabs based on test flights)
Uncrease the winglets. Inspect their leading edges carefully, if they are twisted -- even a little -- the plane will not fly well.
Flip it over, and shape the wings as shown. Now take it outside!